Setup Debian virtual machine on VirtualBox
Create a new VirtualBox VM
In the VirtualBox GUI click "New" and choose the following parameters in the wizard:
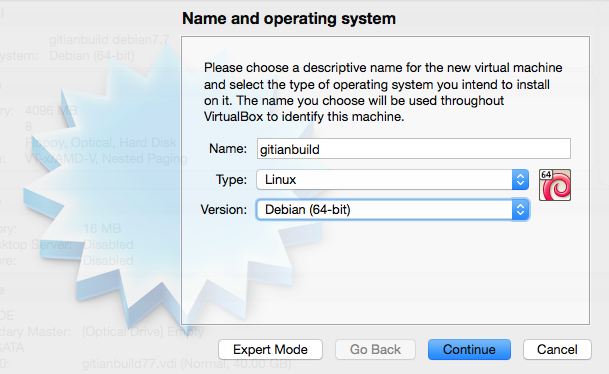
- Type: Linux, Debian (64-bit)
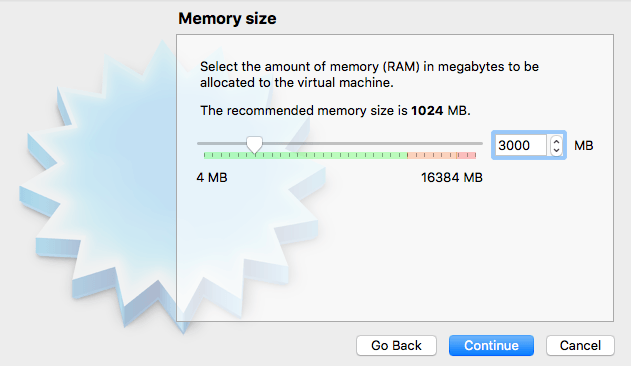
- Memory Size: at least 3000MB, anything less and the build might not complete.
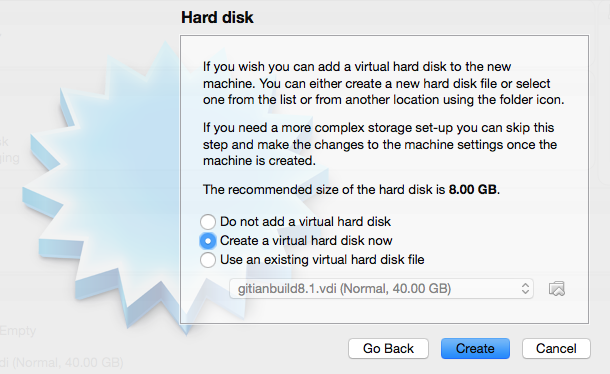
- Hard Disk: Create a virtual hard disk now
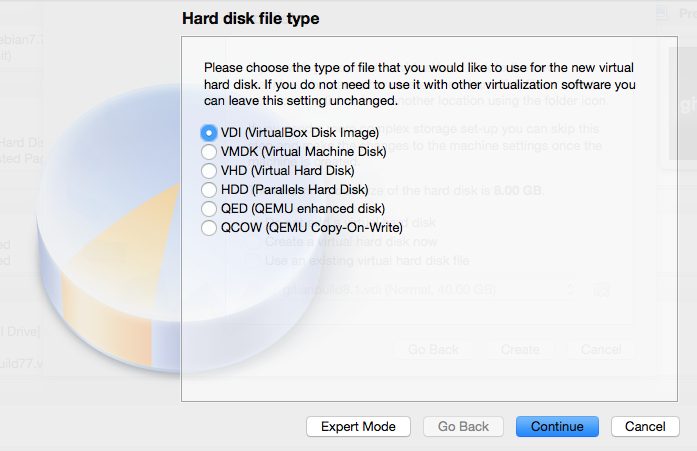
- Hard Disk file type: Use the default, VDI (VirtualBox Disk Image)
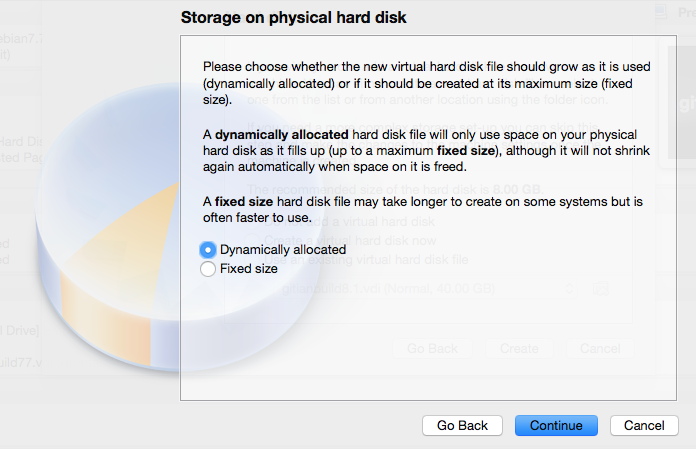
- Storage on physical hard disk: Dynamically Allocated
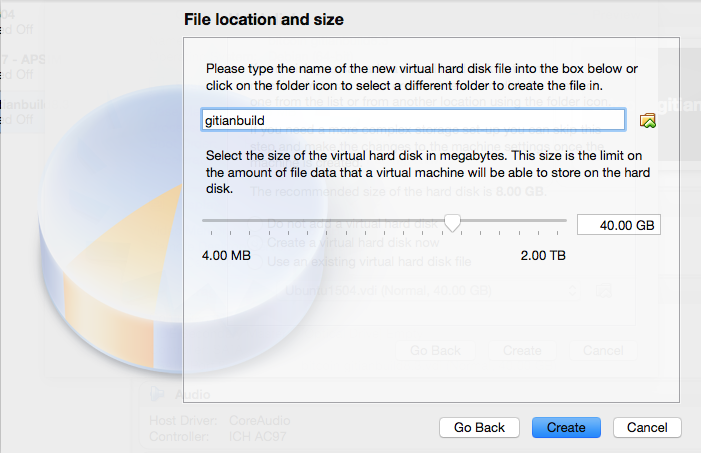
- File location and size: at least 40GB
- Click
Create
After creating the VM, we need to configure it.
- Click the
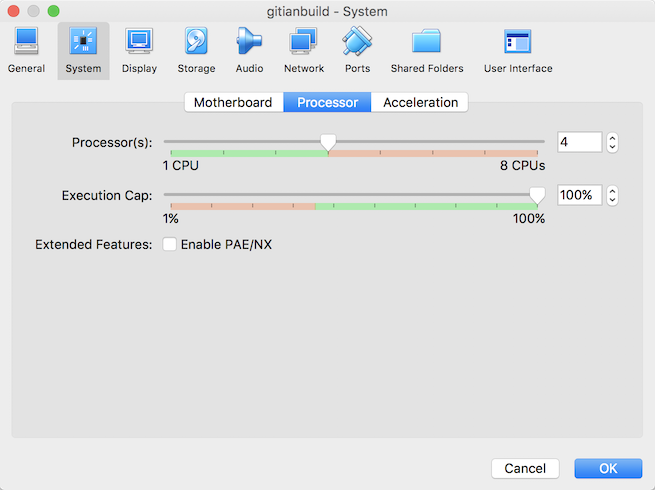
Settingsbutton, then go toSystemtab andProcessorsub-tab. Increase the number of processors to the number of cores on your machine if you want builds to be faster.
- Go to the
Networktab. Adapter 1 should be attached toNAT.
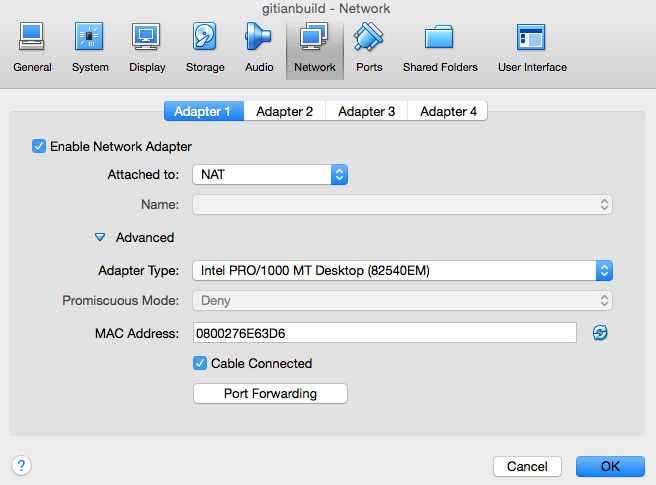
- Click
Advanced, thenPort Forwarding. We want to set up a port through which we can reach the VM to get files in and out. - Create a new rule by clicking the plus icon.
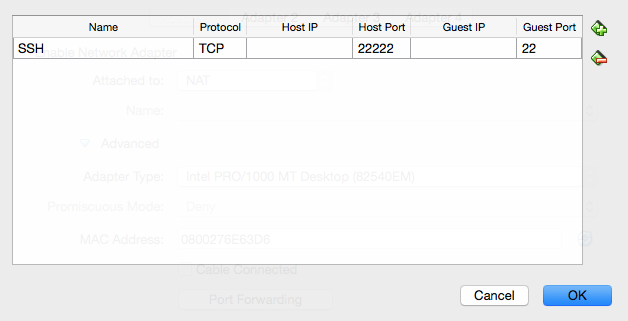
-
Set up the new rule the following way:
- Name:
SSH - Protocol:
TCP - Leave Host IP empty
- Host Port:
22222 - Leave Guest IP empty
- Guest Port:
22
- Name:
-
Click
Oktwice to save.
Get the Debian 10.x net installer and verify its integrity:
DEBIAN_VERSION="12.10.0"
gpg --keyserver keyring.debian.org --recv-keys "DF9B 9C49 EAA9 2984 3258  9D76 DA87 E80D 6294 BE9B"
mkdir -p ~/Downloads/debian-iso-"${DEBIAN_VERSION}"
cd ~/Downloads/debian-iso-"${DEBIAN_VERSION}"
wget "https://cdimage.debian.org/debian-cd/${DEBIAN_VERSION}/amd64/iso-cd/debian-${DEBIAN_VERSION}-amd64-netinst.iso"
wget "https://cdimage.debian.org/debian-cd/${DEBIAN_VERSION}/amd64/iso-cd/SHA256SUMS"
wget "https://cdimage.debian.org/debian-cd/${DEBIAN_VERSION}/amd64/iso-cd/SHA256SUMS.sign"
gpg --verify SHA256SUMS.sign SHA256SUMS || echo "Error: SHA256SUMS did not verify against the given signature!"
    # must not error
grep "debian-${DEBIAN_VERSION}-amd64-netinst.iso" SHA256SUMS | sha256sum -c
    # must return OK
Replace sha256sum with shasum on macOS.
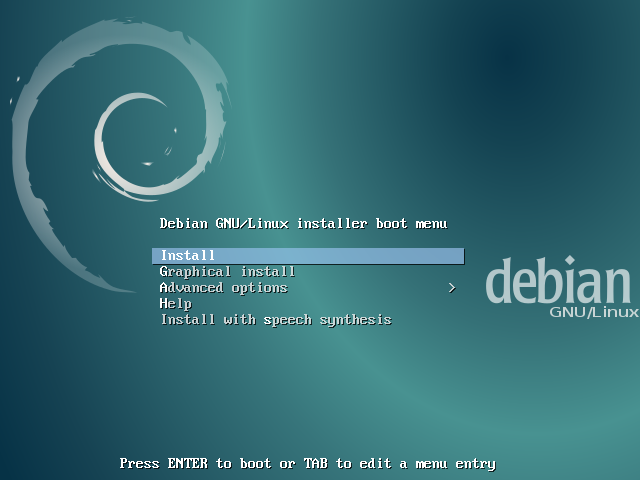
Then start the VM. On the first launch you will be asked for a CD or DVD image. Choose the downloaded ISO.

Installing Debian
This section will explain how to install Debian on the newly created VM.
- Choose the non-graphical installer. We do not need the graphical environment; it will only increase installation time and disk usage.
Note: Navigating in the Debian installer:
To keep a setting at the default and proceed, just press Enter.
To select a different button, press Tab.
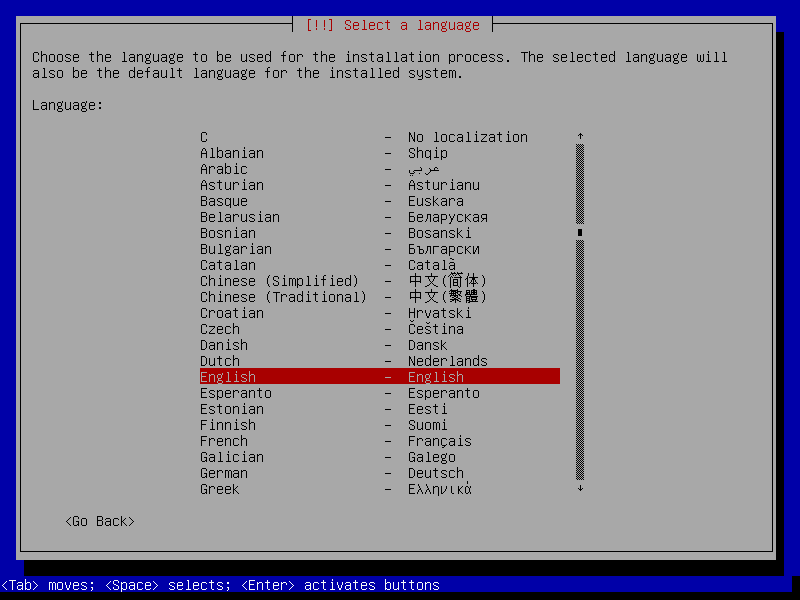
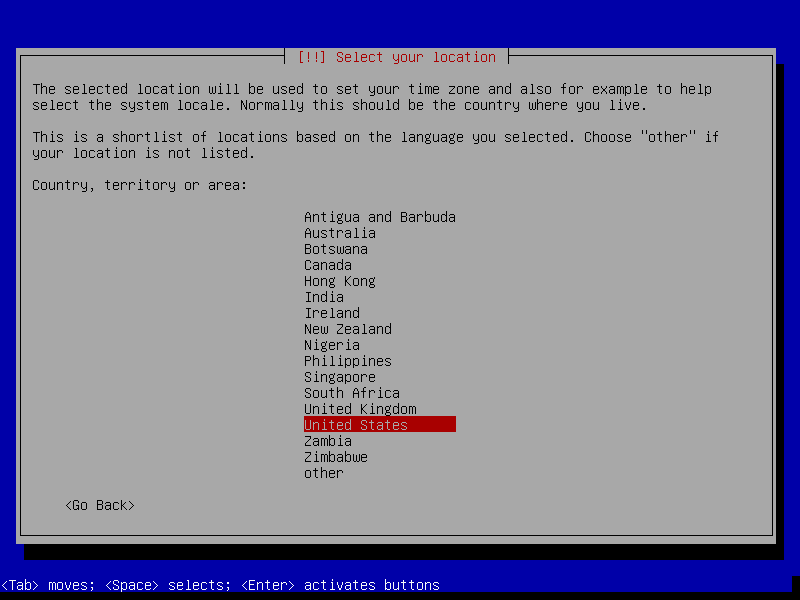
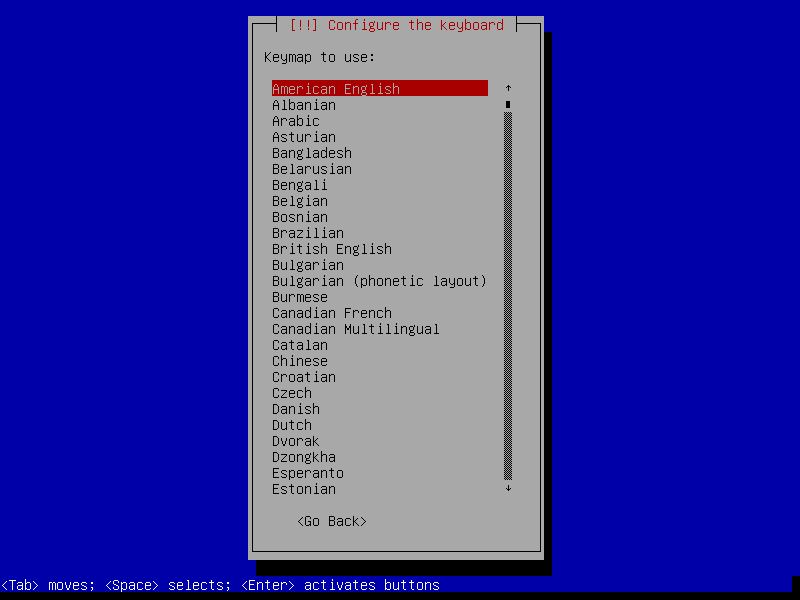
- Choose locale and keyboard settings (doesn't matter, you can just go with the defaults or select your own information)
- The VM will detect network settings using DHCP, this should all proceed automatically
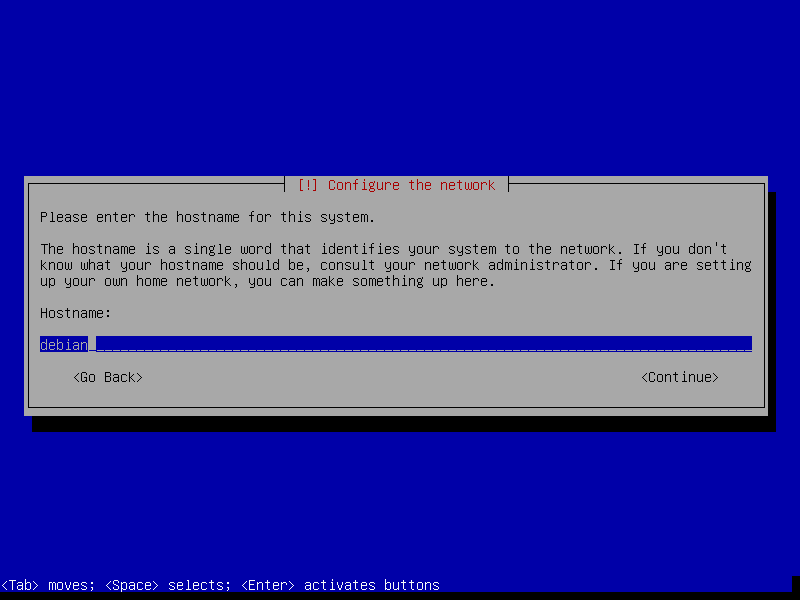
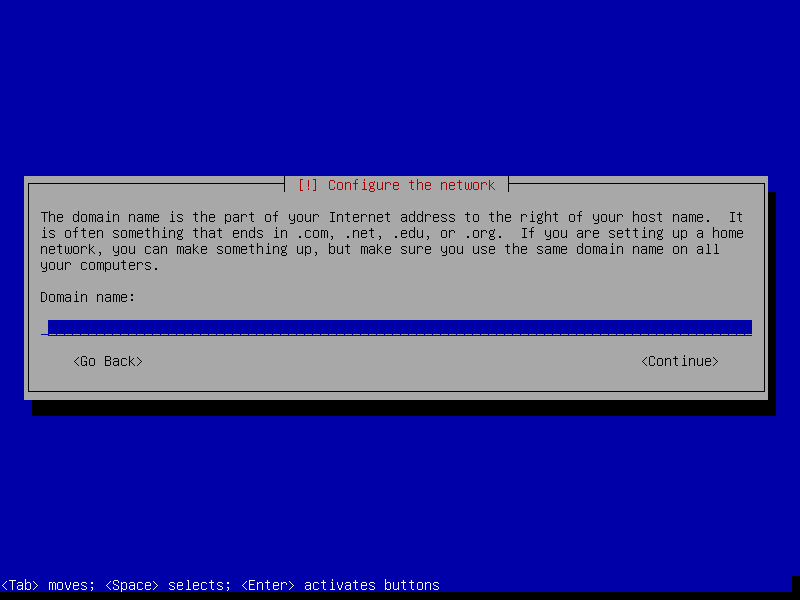
- Configure the network:
- Hostname
debian. - Leave domain name empty.
- Hostname
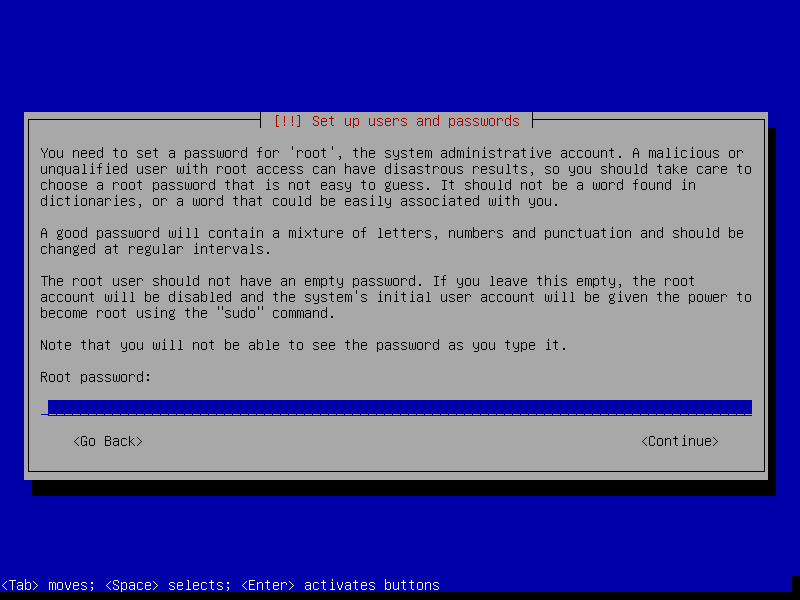
- You can leave the root password empty. Otherwise, enter it twice and remember it for later.
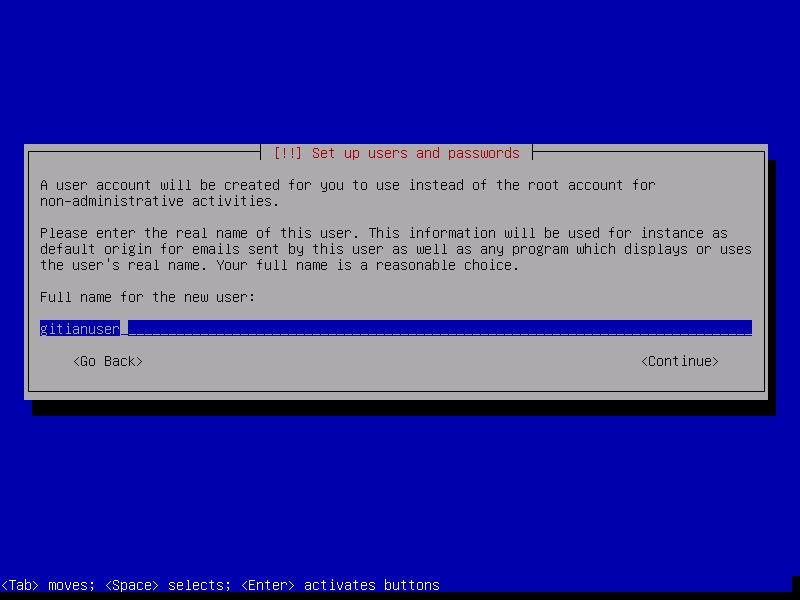
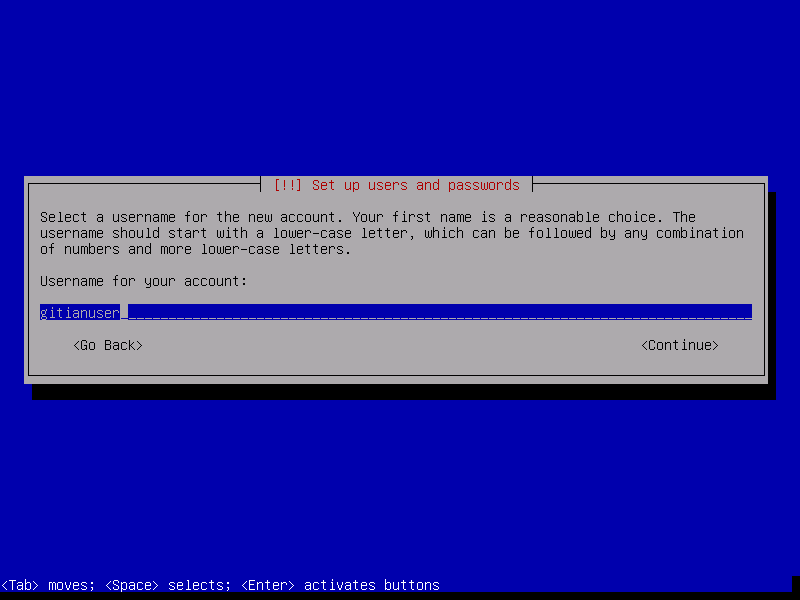
- Name the new user
gitianuser(the full name doesn't matter, you can leave it empty) - Set the account username as
gitianuser
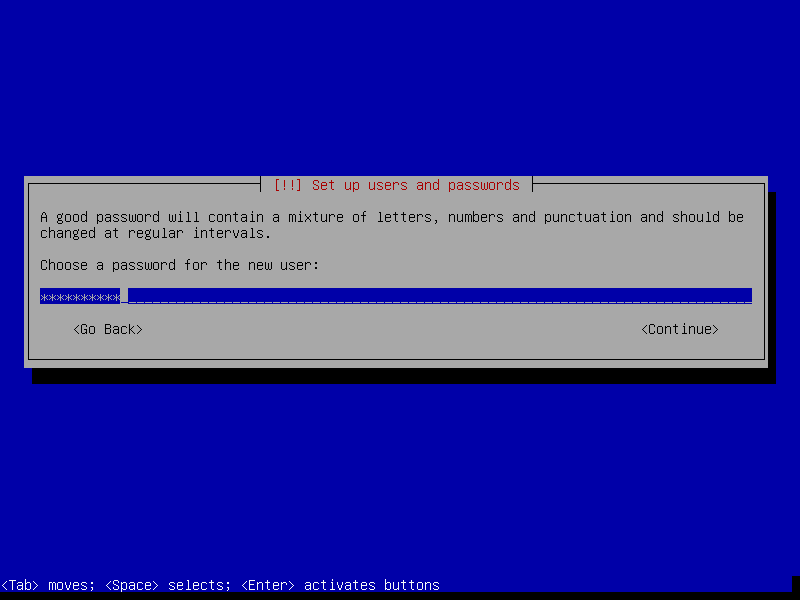
- Choose a user password and enter it twice (remember it for later)
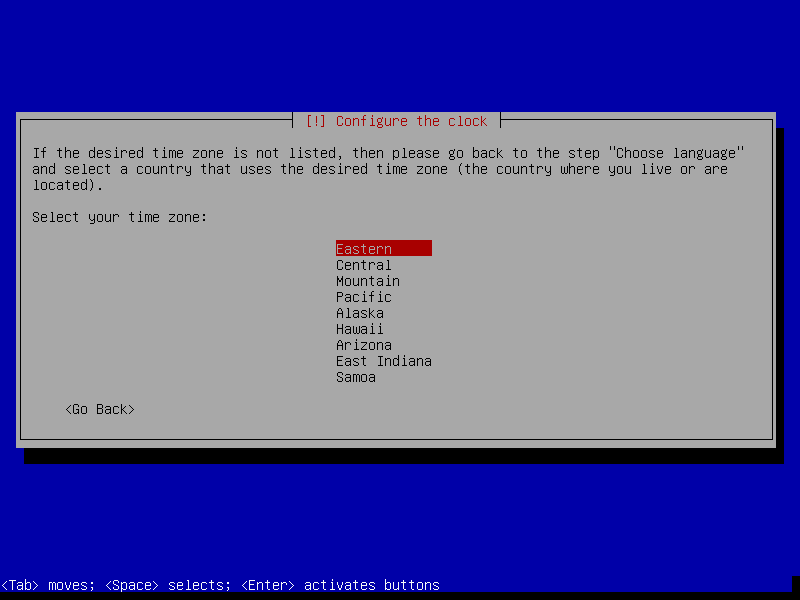
- The installer will set up the clock using a time server; this process should be automatic
- Set up the clock: choose a time zone (depends on the locale settings that you picked earlier; specifics don't matter)
-
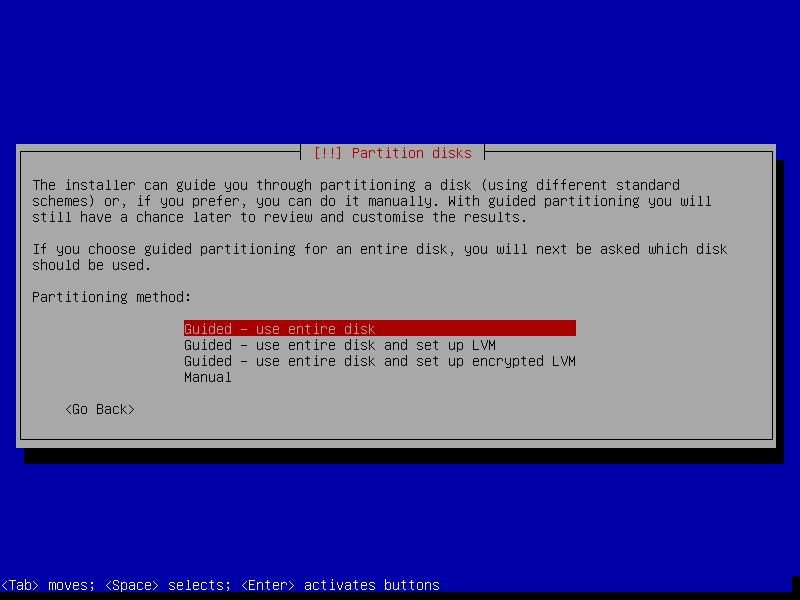
Disk setup
- Partitioning method: Guided - Use the entire disk
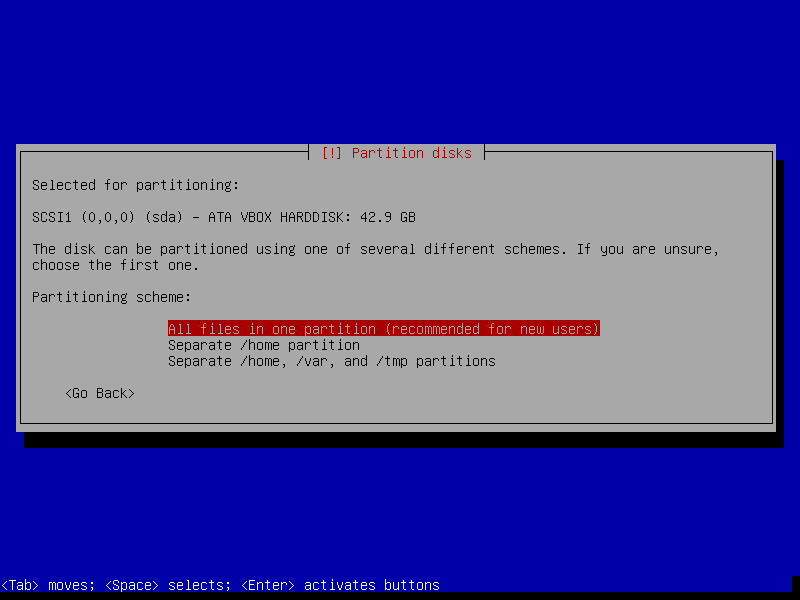
- Select disk to partition: SCSI1 (0,0,0)

- Partition Disks -> All files in one partition
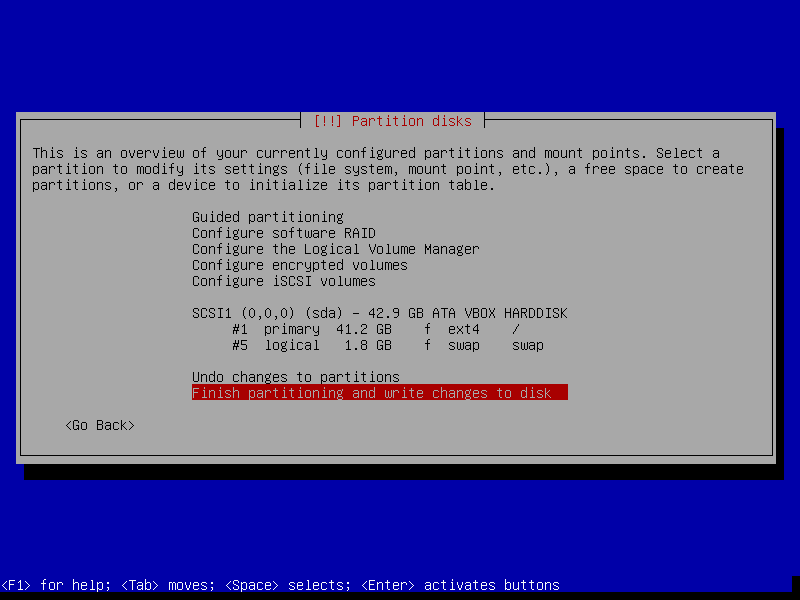
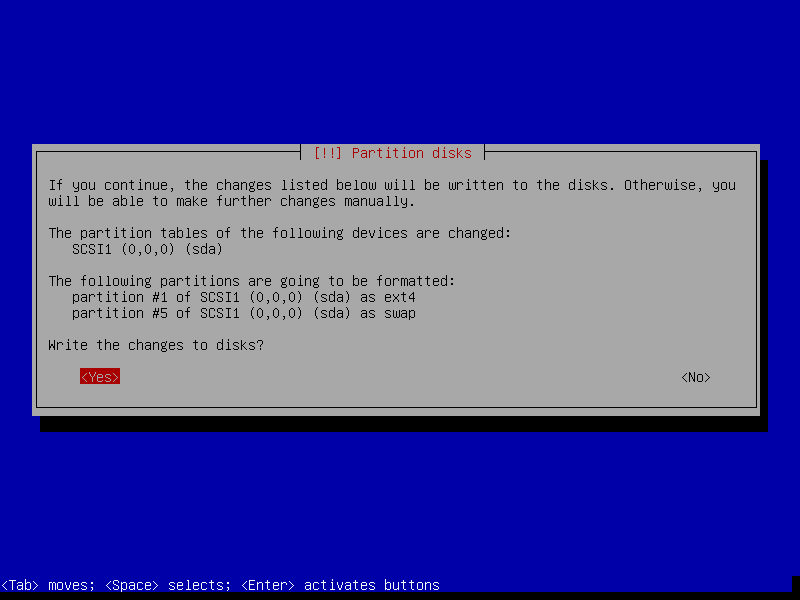
- Finish partitioning and write changes to disk -> Yes (
Tab,Enterto select theYesbutton)
-
The base system will be installed, this will take a minute or so
- Scan another CD or DVD? -> No
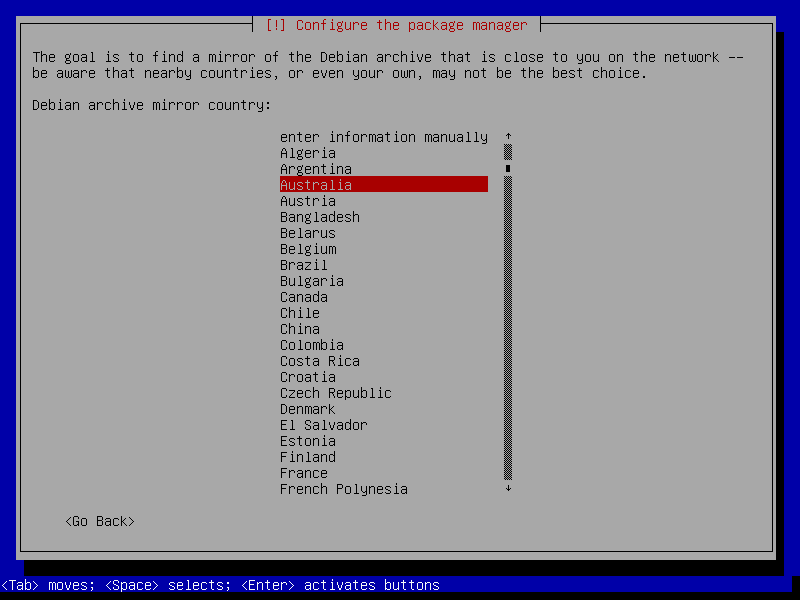
- Choose a mirror (any will do)
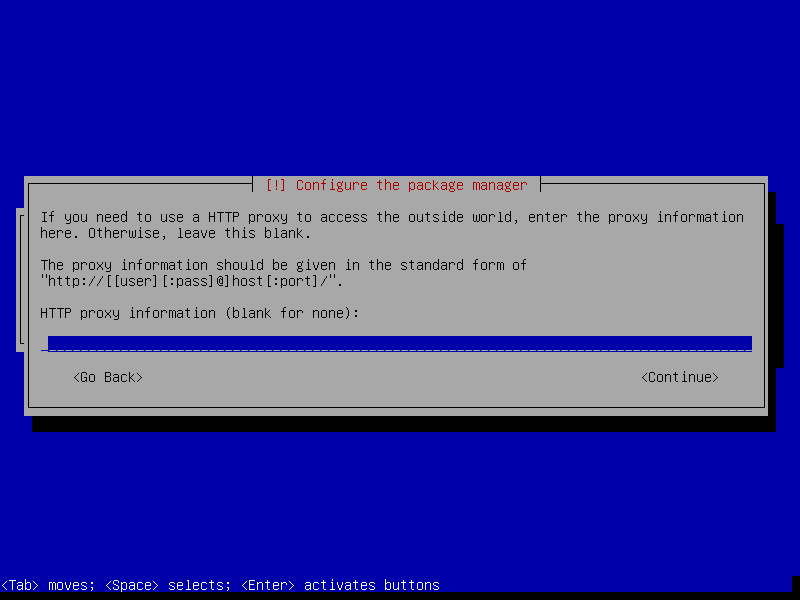
- Enter proxy information (unless you are on an intranet, leave this empty)
- Wait a bit while 'Select and install software' runs
- Participate in popularity contest -> No
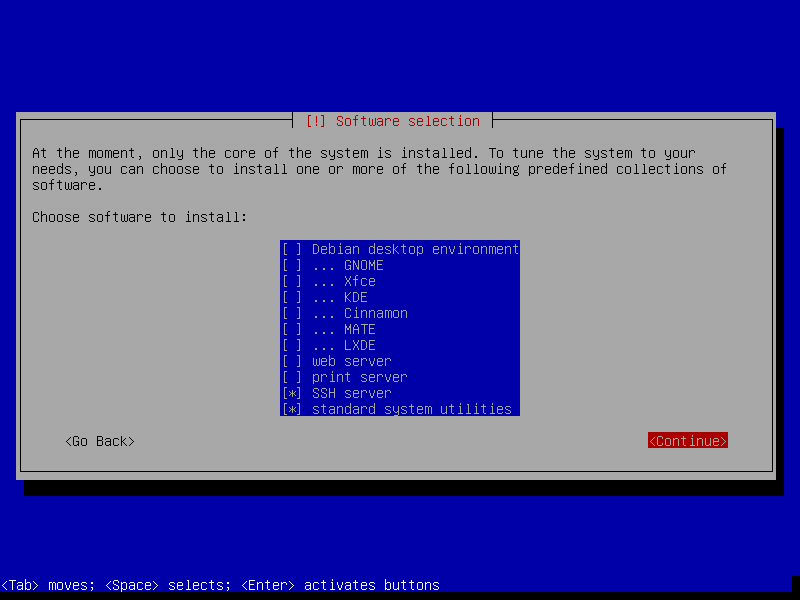
- Choose software to install. We need just the base system. (
Tabto highlight options,Spaceto select them) - Make sure only 'SSH server' and 'Standard System Utilities' are checked
- Uncheck 'Debian Desktop Environment' and 'Print Server'
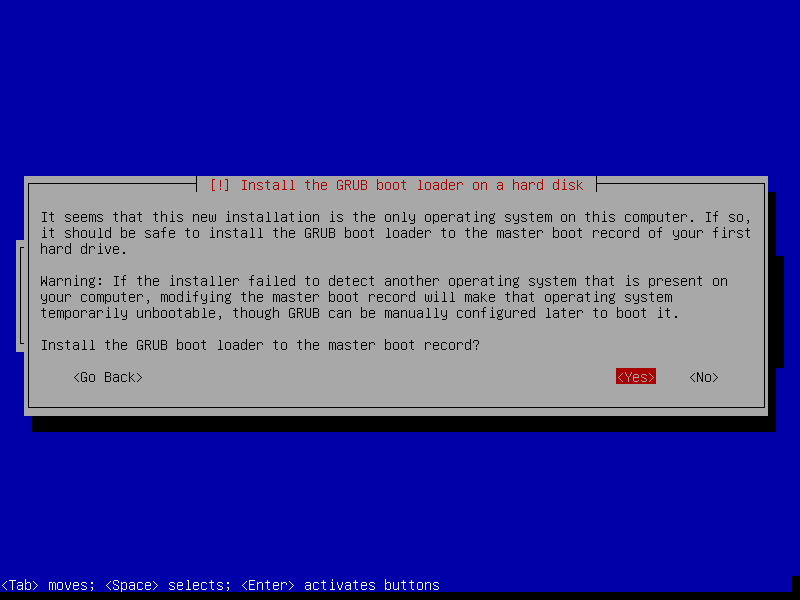
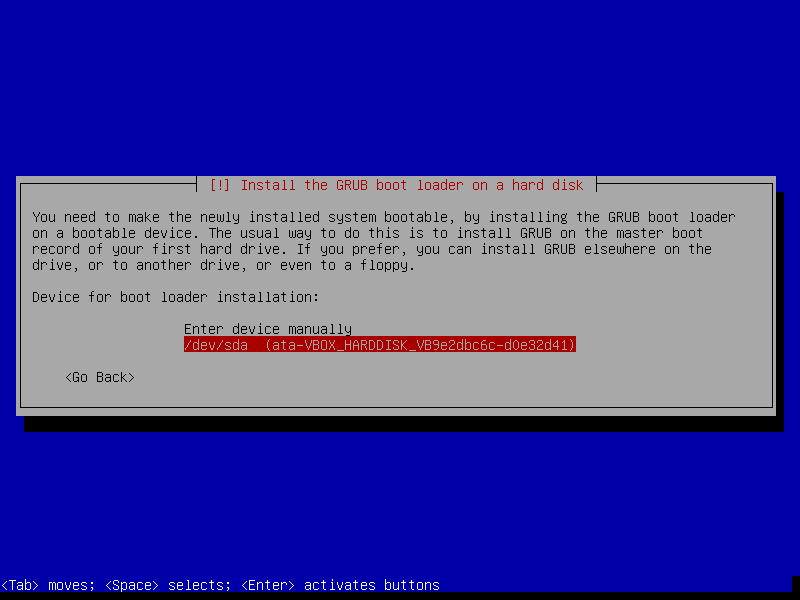
- Install the GRUB boot loader to the master boot record? -> Yes
- Device for boot loader installation -> ata-VBOX_HARDDISK
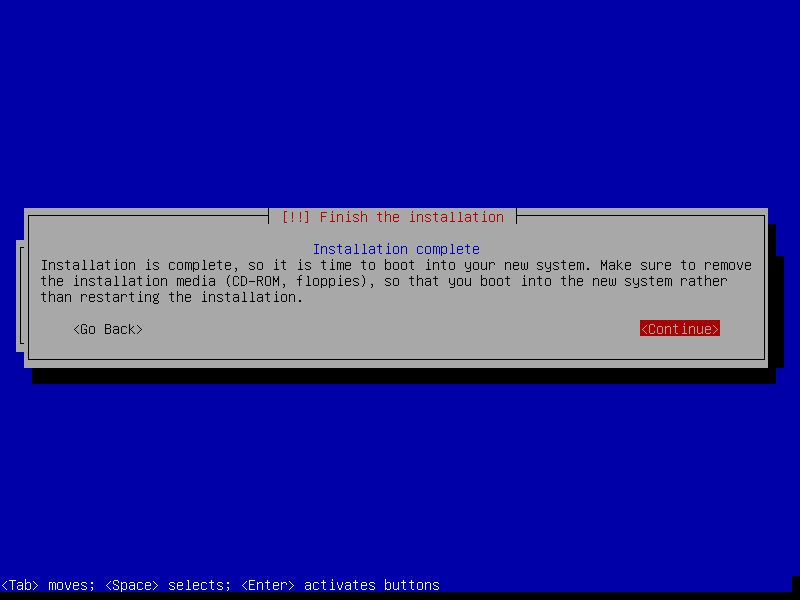
- Installation Complete -> Continue
- After installation, the VM will reboot and you will have a working Debian VM. Congratulations!
Connecting to the VM
After the VM has booted you can connect to it using SSH, and files can be copied from and to the VM using a SFTP utility.
Connect to localhost, port 22222 (or the port configured when installing the VM).
On Windows you can use putty and WinSCP.
For example, to connect as gitianuser from a Linux command prompt use
$ ssh gitianuser@localhost -p 22222
The authenticity of host '[localhost]:22222 ([127.0.0.1]:22222)' can't be established.
RSA key fingerprint is ae:f5:c8:9f:17:c6:c7:1b:c2:1b:12:31:1d:bb:d0:c7.
Are you sure you want to continue connecting (yes/no)? yes
Warning: Permanently added '[localhost]:22222' (RSA) to the list of known hosts.
gitianuser@localhost's password: (enter gitianuser password configured during install)

The programs included with the Debian GNU/Linux system are free software;
the exact distribution terms for each program are described in the
individual files in /usr/share/doc/*/copyright.

Debian GNU/Linux comes with ABSOLUTELY NO WARRANTY, to the extent
permitted by applicable law.
gitianuser@debian:~$
Use sudo to execute commands as root.
Optional - Easier login to the VM
You'll need to generate an SSH key, e.g. by following the instructions under "Generating a new SSH key" here.
After that, login to the VM and enter:
mkdir .ssh
On your machine edit or create ~/.ssh/config and add:
Host gitian
    HostName localhost
    Port 22222
    User gitianuser
Open a new terminal tab and enter:
scp ~/.ssh/id_rsa.pub gitian:.ssh/authorized_keys
Next time you need to login to the VM, just use: ssh gitian